I thought I might compose a list of photography tips and tricks for beginners for y’all.
1. Take a camera EVERYWHERE. I mean this. There was a period of time when I was really into photography but didn’t take a camera everywhere (this was when I only shot digitally, I hated how heavy my SLR was plus carrying round something of such value). That’s why I love film cameras (I can carry at least 3 film cameras on me most of the time which are light and aren’t worth much – win win). Take good photos, bad photos, just shoot all the time. Don’t strive for perfection. Try shooting a variety of subjects, see what you like best. Experiment lots. Shooting lots is how you develop a good eye.
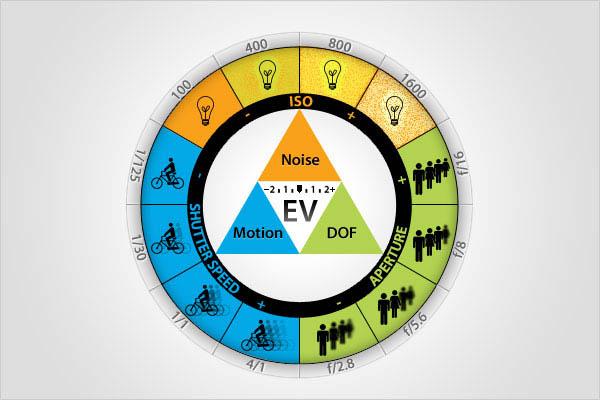
Photo Credit: petapixel.com
2. If you don’t yet understand the basic concepts in photography (aperture, shutter speed, etc.) shoot on automatic without flash. I hate flash. I think it ruins many a good photo and looks horrible. These concepts are 200% something you should learn and understand in the future but aren’t really necessary when you are first getting to grips with photography.
3. This might be my personal opinion, but don’t get all caught up in photography theories. Following “the rules” doesn’t necessarily make good photos, developing an eye does. The rule of thirds is probably the only photography theory I would learn and I frequently apply this to my work.
4. If you are serious about photography, I would advise you to buy an SLR. I personally don’t feel you can progress much without one. People will tell you that you need to spend a lot on your camera body – not true. Most SLR camera bodies do pretty much the same thing. Your lenses are the most important thing, buy good ones. Lenses are where you should be investing your money. Realistically all you need is a £300+ body and some fantastic lenses. The 18-55mm lenses that come with most SLRs will work for 90% of the situations you will need it for. I paid about £500 for my SLR and I still have the same one (much better lenses though). If you are just starting out there is no way it’s worth shelling out £2,000 for a camera body.
5. Get a tripod. This is something I would really recommend you get. Again, you don’t have to spend crazy money on it. £50 should get you a more than decent tripod. This will really help in low light situations (avoiding the flash), you can experiment with self portraits and reduce camera shake generally.
6. Get some good editing software. Photoshop is the obvious one. Photoshop probably a little complex for the novice (then again, I’m completely self taught) but there is a whole world of free editing related tutorials on youtube and online. GIMP is what I used before I got ahold of photoshop – it’s free! There are also a great selection of online photo editing softwares such as pixlr.
7. Gain a basic understanding of your camera, read the manual. I actually brought a book explaining my SLR model in great detail as well as some basic photography concepts. It was one of the best things I did for my photography.

Photo Credit: w3.unisa.edu.au
8. Learn some basics on resolution. Even if you don’t know this: you want to always take photos in the highest resolution/quality possible. Never drop quality for space reasons. If your camera has the ability to shoot RAW you should use it, RAW is another file format to JPG and most SLRs have the ability to shoot in both. JPG is a compressed file so you loose quality among other things. You have much better editing capabilities if you shoot RAW (like the ability to change the white balance in post production – see no. 10 for more info on this).
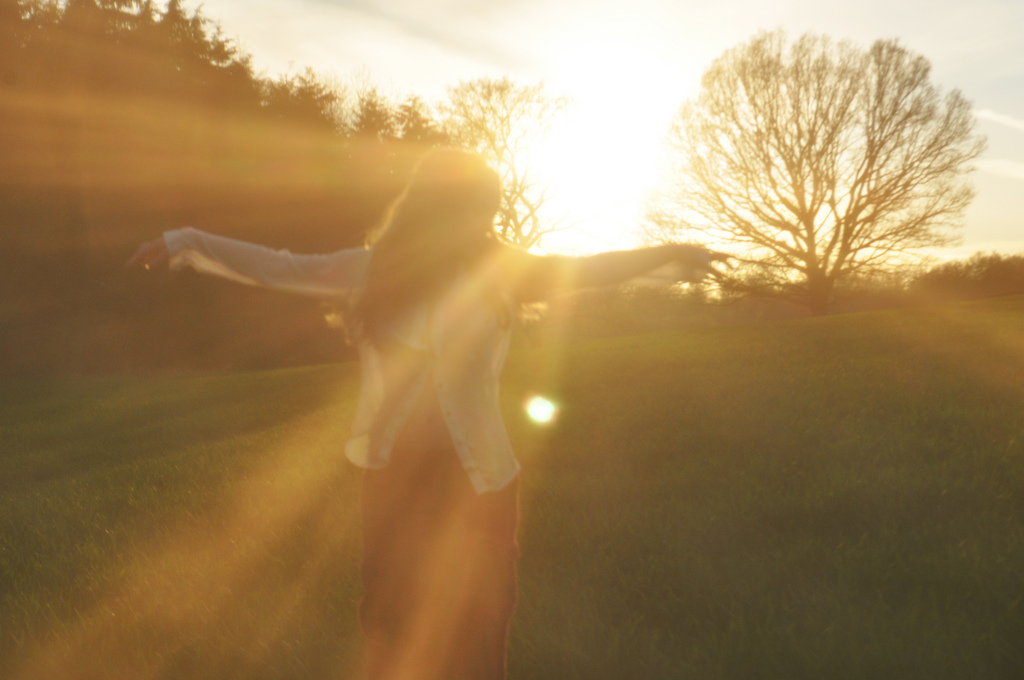
Shooting During The Golden Hours – Photo Credit: Mine
9. Lighting is one of the most important things in regards to photography. It really can make or break a photo. Direct sunlight can create harsh light. When the sky is overcast is works like a giant softbox creating even light (can be a little bland at times). My personal favourite time to shoot is sunset (the golden hours), creating stunning orange colours and beautiful backlight opportunities.
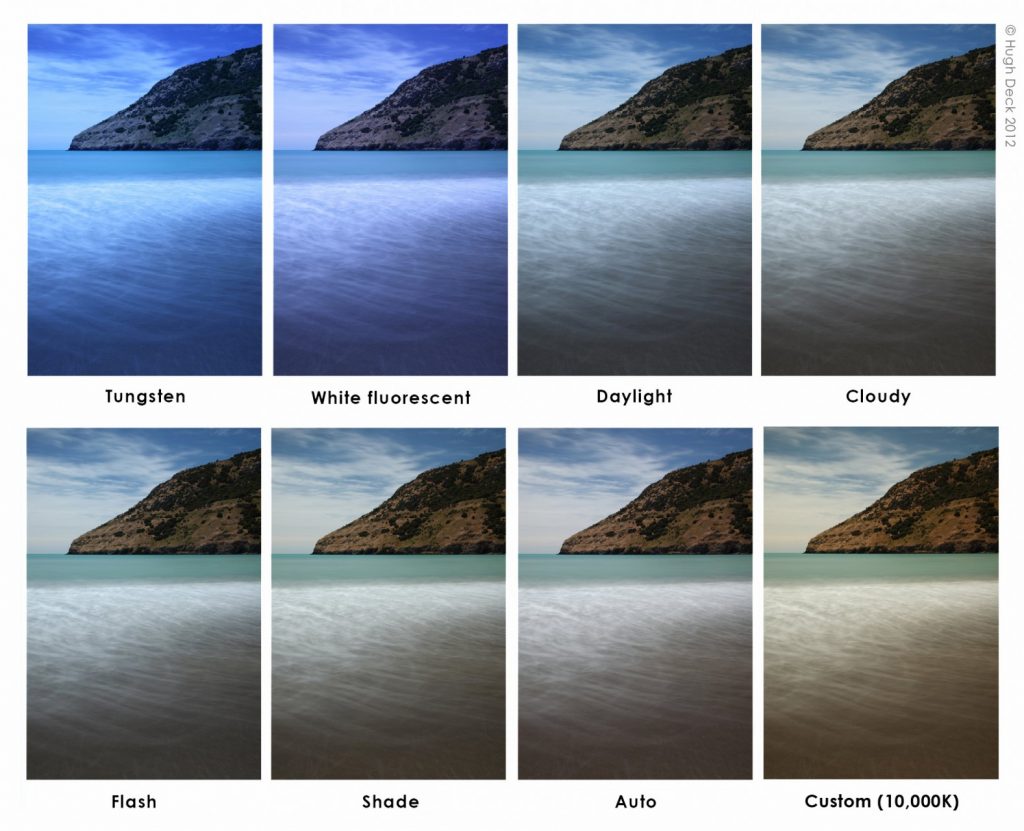
Photo Credit: color.co.uk
10. White balance understanding is vital for well coloured photos. Ever taken an image that had a strange colour cast? It was probably due to the wrong white balance setting. Turn your camera off auto and try taking an image on every white balance setting. It should change the hue of your image from very cold blue (Incandescent) to a very warm orange hue (flash/sunny).
This was taken from the nikon site:
The Incandescent setting is best for traditional household bulbs; Fluorescent will prevent the green cast common to photos taken in fluorescent light; Cloudy will add a bit of warmth to the light; Flash adds a more aggressive touch of warmth to take the edge off the bright light of a flash; Open Shade adds a slight pink tone to eliminate the blue cast that shadows take on in open shade; and Sunny sets the color temperature to 5000 degrees Kelvin, which is typical of mid-day sun.
After you know this, you can manipulate the colours in your photos (by setting the white balance accordingly) as well as reduce those dreaded colour casts.